The High-Pass Filter: What it Does and How it Can Clean up Your Mix
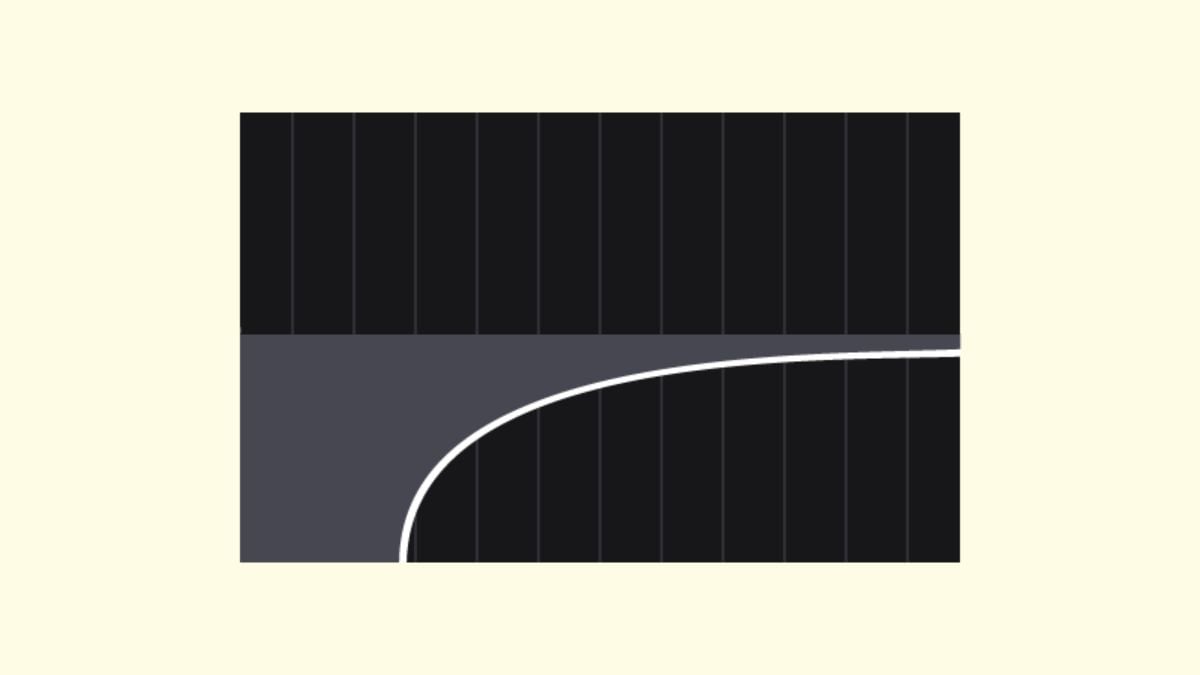
The humble high-pass filter is one of the most simple tools you will ever use in your mixes – but that doesn’t mean that it isn’t hugely important when it comes to achieving a great mix.
In fact, once you become aware of how much it can help clear up a muddy bottom end, you might well end up using it on almost every project you do.
What is a High-Pass Filter?
A high-pass filter is a simple EQ that is used to reduce the low-frequency content of an audio signal. It is called a high-pass filter as it allows frequencies above a cut-off point pass through while cutting frequencies below this point.
Users can set the cut-off frequency as well as the slope and the Q of the filter. And don’t worry. We’ll explain what these settings do in more detail below!
What Is a High-Pass Filter For?
The main reason high-pass filters are used is to remove unwanted low frequencies from a sound source. It is quite common for individual instrument channels in a mix to contain all kinds of low frequency information that doesn’t contribute positively to the sound of the music.
These kinds of sounds could include mic rumble on a vocal performance caused by the vocalist moving the feet near the mic stand or the ill-defined lowest frequencies of a guitar performance.
If you add up these unwanted sounds over a large number of tracks, the bottom end of your mix can become extremely cluttered up with sounds that you don’t really want to be in there in the first place.
High pass filters allow us to easily remove these types of sounds from a mix, leaving much more space in the bottom end for the instruments that really need it – such as the bass and the kick drum. This in turn brings clarity and power to the low end of our mixes.
As well as applying a high-pass to individual instrument tracks, you might also consider applying it to your reverb bus.
We often don’t really hear that much of the bottom end of a reverb in a mix – this effect tends to be far more obvious in the upper part of the frequency spectrum. That means that the bottom end of a reverb channel can start to clutter up a mix without really bringing any overall benefit to the sound.
As with any other effect, there are creative applications as well as technical ones.
For example, you can use a high pass filter sweep across your mix to remove all the bottom end from one section of a song – this is a tool often used by DJs when mixing live. Sweep out the bottom end so that when you bring it back in, there is a huge impact.
How Does a High-Pass Filter Work?
As we mentioned previously, there are three controls on most high pass filters. The most important of these is the cut-off. This sets the point at which the filter starts cutting.
Be careful when setting the cut-off as you don’t want to remove too much warmth from an instrument. Try to cut at a point where clutter is removed but important harmonic content is retained. Listen carefully to determine this.
You should set your cut-off in combination with your slope. The slope control dictates how gently or drastically the cut is made to frequencies below your cut-off. An extremely steep slope will remove all frequencies below the cut-off point, while a more gentle slope removes them more gradually.
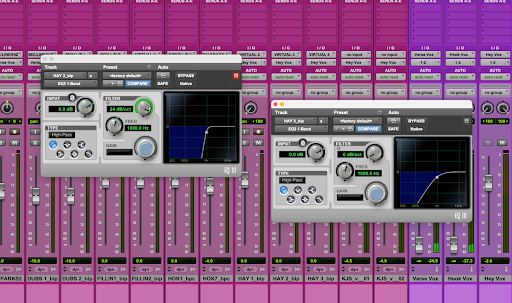
The first high-pass filter has a steep slope, while the second has a gentler one.
Not all high-pass filters will have a Q control, but if they do, it controls the resonance of the filter; it allows you to boost right after the cut. You can see this in the image below.
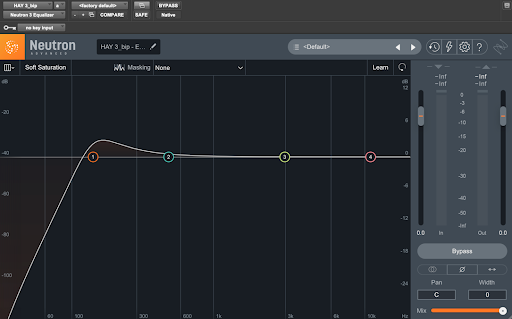
Adding resonance to your filter can really help if you are planning on automating a filter sweep – it can help to generate that analogue synth ‘zapping’ sound. It can also be useful when sculpting a kick drum sound – boosting the all-important boom of the drum, while removing unwanted frequencies below it – perhaps to make room for a sub bass.
High-Pass Filter vs. Low-Pass Filter
While discussing the high-pass filter, it’s definitely worth giving a mention to its sibling – the low-pass filter. As you might already have guessed, this is an EQ that does the exact opposite. When you set the cut-off on a low-pass filter, it only allows frequencies lower than this to pass. There are plenty of creative applications for this filter and you should take the time to learn more about them at some point.
However, for now, we just want to flag up that a high-pass and a low-pass can work extremely well together when you want to process different parts of the same sound in different ways. For example, perhaps you want to process a bass sound differently under 300Hz to how you process it over 300Hz.
This could allow you to keep the lower part of the sound in mono and perhaps you could also compress it more heavily for a more controlled bottom end in your mix. At the same time you could have the upper part of the sound in stereo to add more width to the mix overall, and perhaps you could add some distortion to this part of the signal to really bring out the transients – adding definition to the start of notes.
This process of splitting a sound in two is easily done – send the output of the track you want to split to a bus, and send this bus to two new auxiliary tracks.
Put a high-pass on one and a low-pass on the other – and then set both cut-offs to the same frequency (in our example this would be 300Hz). You should also set a steep slope so that there is no crossover between the two new tracks. Now you are good to go – you can process the upper and lower frequencies of a sound completely separately to one another.
Active vs. Passive High-Pass Filters
The high-pass filters that we’ve discussed so far have been ‘passive’. Once the cut-off is set, it remains at the same value. An ‘active’ high-pass filter is one that incorporates a cut-off that responds in real-time to audio input.
Essentially, this is a dynamic EQ, and it’s possible that you will find this tool useful in specific situations – such as when you are dealing with wildly fluctuating lower frequencies on a track.
With the correct settings, the filter will only kick in when it is needed – and will not affect the sound when it is not required. Of course you can get to the same place by automating a passive high-pass filter but it may take a while longer.
The 3 Best High-Pass Filter Plugins
Here are a few high-pass filter recommendations for you so that you can get started with the techniques we’ve covered above.
1. Your DAW Filter
You will undoubtedly have a high-pass filter included as one of the bundled plugins that came with your DAW. If you don’t see it as a standalone option, then you probably have it incorporated into a multiband EQ. For the standard task of removing unwanted bottom-end, the filter that came with your DAW will work just fine; you don’t need to invest in a third party plugin.
2. Waves Meta Filter
If you want to get creative, then Waves’ Meta Filter is a great place to start. Its list price is $149 but it is frequently available for less than $30. This is much more than a high-pass filter, including 5 different filter shapes. It also contains analogue modelling technology, a sequencer, LFO and envelope follower. That means it’s perfect for filter automation that is quick and easy to dial in, and it sounds great.
3. TAL - Filter 2 (free)
If you want a plugin that allows for easy filter automation but you’d rather not spend any money, then your best bet is TAL’s Filter 2 which is available completely free. Filter 2 makes it easy for you to draw in different filter shapes, and also allows for volume and pan automation. It’s a great little tool.
While we’re recommending free filters, you might also want to check out BPB’s Dirty Filter. This plugin has a simple interface with a high-pass, low-pass and a slope control. What makes it interesting is that it also has a drive knob that allows you to saturate the signal as you are filtering it; you can dial in some very cool sounds on this plugin!
Hopefully you now have a very solid grounding in what high-pass filters are and how they are used. If you now want to quickly ramp up your ability to analyse how a filter affects a sound, you should check out SoundGym’s Filter Expert game. In the game you compare filtered with unfiltered sounds and are asked to identify the specific filter setting. It’s a fun way to quickly get to grips with exactly how filters change the character of a piece of audio.
Comments:
Sep 05, 2023
Sep 04, 2023
Aug 31, 2023
Login to comment on this post