Gain Staging: What It Is And How It Can Level Up Your Mix
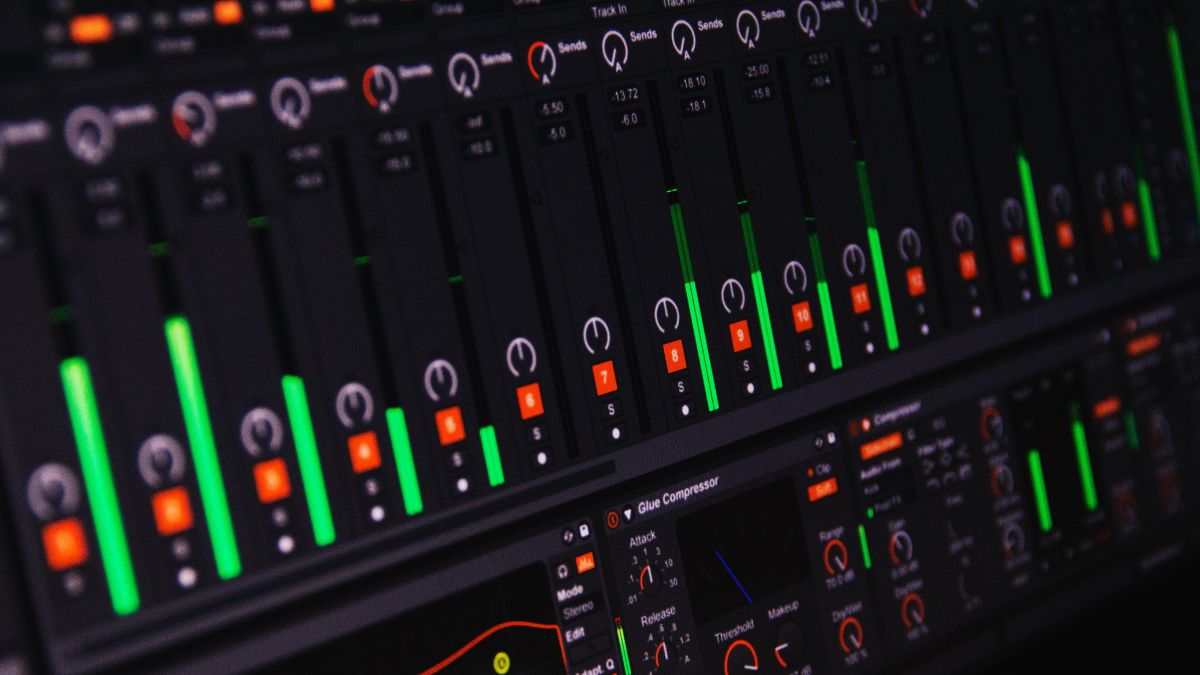
Gain staging is a subject that is rarely discussed by novice producers, but it’s a vital part of a pro-level mix. The basic concept is fairly straightforward; the idea is that you ensure audio signals are consistently at the optimal level throughout your recording, mixing, and mastering sessions.
Appropriate gain staging ensures that unwanted noise and distortion are kept to a minimum, allowing you to achieve the best sounding recording possible. But what is an ‘optimal’ recording level? Where should you adjust gain levels? And what about the differences between analogue and digital technology?
As we dig deeper into this subject, it emerges that it is a little more complex than it first appears. In order to help you navigate the area, we’ve broken the topic down into sections. We’ll discuss the concept and terminology for you in clear terms so that by the end of this article, you’ll be able to proficiently implement gain staging in your mixes.
What is Gain Staging?
Gain staging is ensuring that your audio is at an optimal level at every stage as it travels along your signal path. The phrase ‘signal path’ describes the flow of audio through your project. Let’s use an example to explain: The start of a signal path might be a guitar that is plugged into an audio interface. From the interface, the audio travels into your computer and then into your DAW. From there, the signal might be sent to an individual track, where it passes through a number of insert effects before reaching the track fader. After the fader, it passes through the track output, where it is sent to your session’s master fader before passing through a digital to analog converter and reaching your monitor speakers. At many of the stages on our example signal path, it is possible to adjust the gain.
So what do we need to adjust for in order to make sure that the signal is at an ‘optimal’ level? In traditional analogue systems, we would need to make sure that our signal strength is strong enough to drown out the inherent ‘noise floor’ of a recording (a blanket of hiss that is present in all analogue recordings) while not being so loud that it causes unwanted distortion. The picture on digital systems is a little more complicated – and we’ll get to that in due course! First, however, we’ll discuss analogue gain staging in a little more detail.
Gain Staging with Analogue Hardware
Analogue hardware has physical limits above which a signal will distort. Small amounts of analogue distortion can sound pleasant – warming up a sound and adding character. It is worth bearing in mind, however, that while distortion might sound great on individual tracks when they are soloed, if you add up multiple layers of distortion across large numbers of tracks in a session, the final result might start to become fuzzy and indistinct. It is, therefore, common practice to make sure a decent amount of ‘headroom’ is retained before the point of distortion on analogue systems. Think of gain staging as a balancing act between ensuring that signals are loud enough to drown out the hissing of the noise floor, while not being so loud that they cause distortion.
Gain Staging in the Digital Realm
Gain staging on digital systems rests on the same basic principles, but as we’ve already mentioned, it is a little more complicated. Digital systems also have a point of loudness at which distortion occurs; 0 dBFS. This stands for 0 decibels full scale and represents the highest possible level in the digital realm. Beyond this point, harsh digital clipping occurs. While there are certainly creative uses for digital clipping, and it is desirable as an audio texture in certain circumstances, in the very vast majority of cases, it should be avoided at all costs. Take a look at the example below.
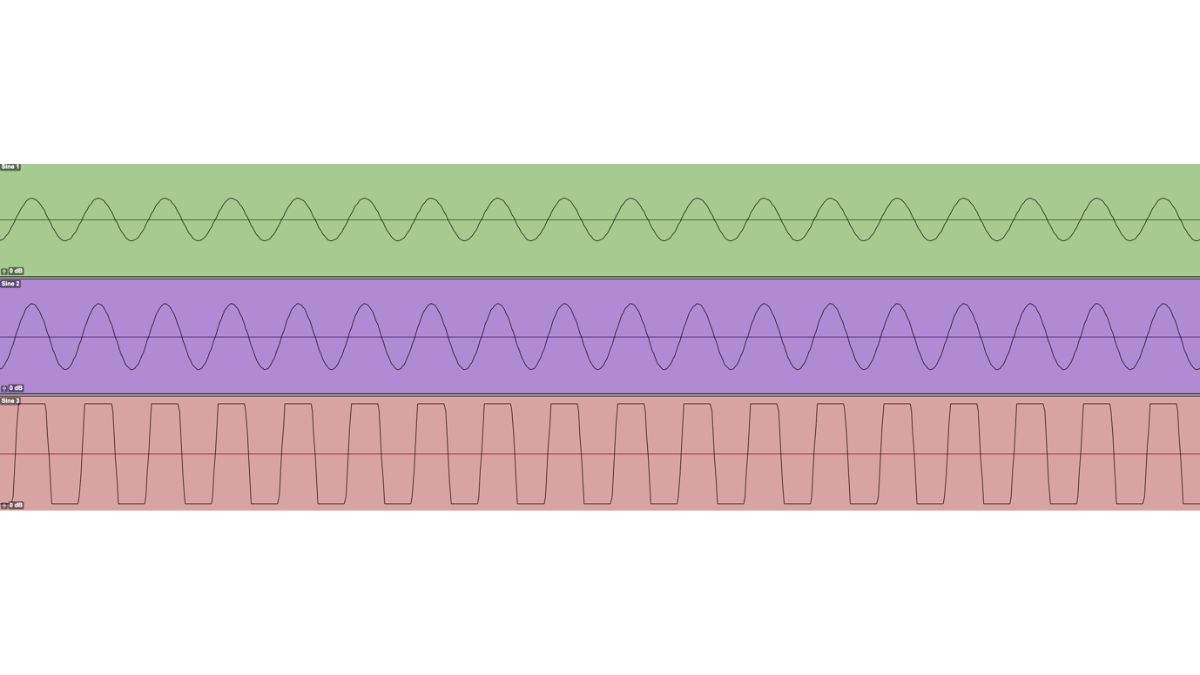
Here we see how digital clipping can affect your audio. The audio coloured green shows a sine wave with plenty of headroom. The audio coloured purple shows the same tone but with the gain boosted so that it now has less headroom. The audio coloured red shows the same tone, but in this case the gain has been boosted so far that clipping is occurring. You can see that the information at the top and bottom of the wave form has actually been lost due to the waveform being squared off.
Once upon a time, working with digital was much like working with analogue. Careful gain staging was required throughout the signal path in order to avoid digital clipping. This was back in the day of fixed point digital interfaces. On these systems, passing the digital ceiling meant distorting an audio signal in a way that couldn’t be fixed later on; once that information was deleted from the wave form it was gone forever. However, in recent years DAW and plug-in developers have gradually started using floating point processing to the point where it is now pretty much the standard. This has been a game changer.
Understanding the mathematics behind floating point systems isn’t necessary, but it is worth knowing how they have affected gain staging. If you are Z (and at this point most of them do use this technology), you can pass 0 dBFS internally (for example when sending audio from a channel output to a bus) and still fix any digital clipping before your audio reaches your DAW’s master fader.
Some DAWs represent this visually in their interfaces. Pro Tools, for example, differentiates between ‘overs’, coloured orange, and ‘clipping’ coloured red:
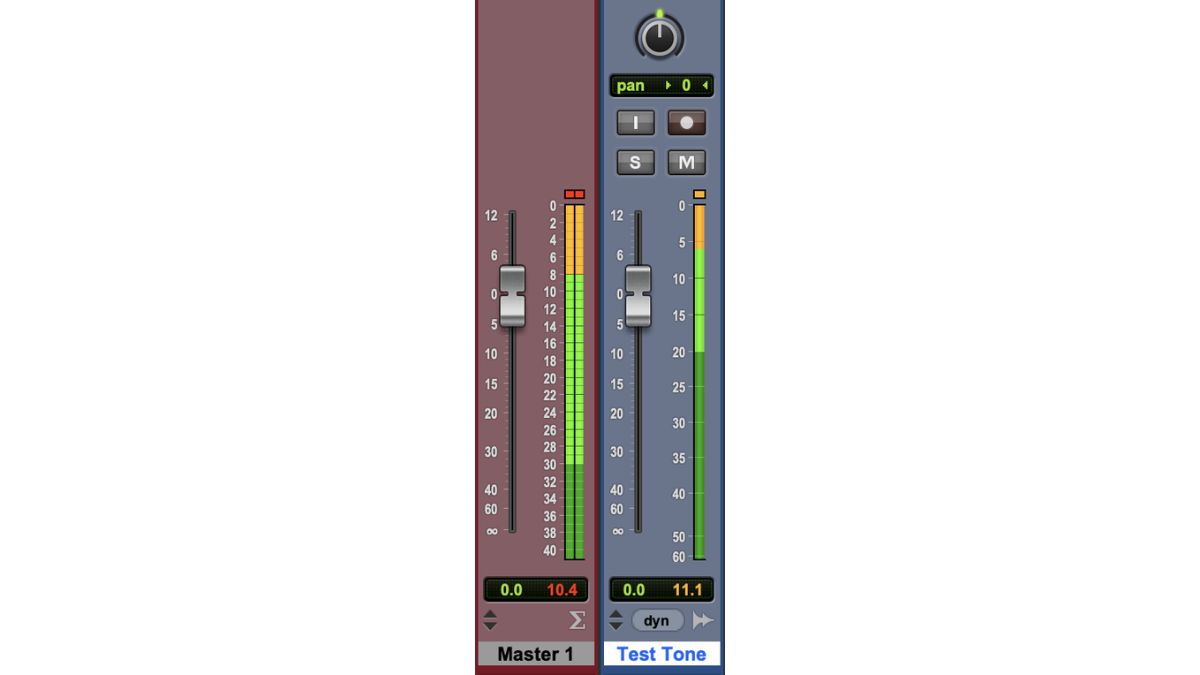
‘Overs’ happen when a signal passes 0 dBFS on the way to an internal destination, while clipping happens when a signal is sent to an output or disk file. This differentiation is important as ‘overs’ are not necessarily a problem – but clipping is. The end result is that we are generally much freer when gain staging in the digital realm, although there are still numerous things to consider and we’ve detailed these below. The important thing to remember is that if any of your output channels exceed 0 dBFS, they will distort.
Is Gain Staging Necessary?
Gain staging is incredibly important if you want to create professional sounding mixes. Without it, your mix could be cluttered with unwanted noise and distortion. Ultimately this can lead to it sounding muddier and less punchy.
With careful gain staging, this lack of additional noise also means that your track can sound louder after mastering.
Common Gain Staging Terminology
We’ve been using plenty of specialist terminology while discussing gain staging, so for the sake of clarity let’s go over some of the key terms and define exactly what they mean.
Clipping
Clipping is what happens when the gain of an audio signal is pushed beyond the capabilities of the hardware that is attempting to handle that signal. This causes distortion. While analogue distortion can be desirable in certain circumstances, digital distortion rarely is and should be avoided in most cases.
Headroom
Headroom can be thought of as a kind of ‘safety zone’ that you put in place to ensure that particularly loud peaks in your audio aren’t too close to the clipping point. It’s important to allow yourself some room for manoeuvre, and if you are right up against the clipping point it can be more difficult to make volume adjustments. Without reasonable headroom, it is also all too easy to accidentally make a small change that pushes your signal into an area where it will distort.
Making sure you have enough headroom can be as simple as lowering a fader, or turning down a gain control on a plug-in.
Noise Floor
In analogue recording each piece of equipment you use will create some low level noise as a by-product of its operation. If you are recording a voice then noise will be generated by the microphone and the pre-amp. This noise manifests as a hissing sound. If your recorded signal is too quiet, then this hissing will be louder in comparison. When you turn up the vocal in order to hear it, then the hissing could start to become audible in your mix. It is therefore important to make sure that we record at louder volumes (making sure that we leave enough headroom of course!) so that the noise floor is comparatively low and does not adversely impact our mixes.
In digital systems the noise floor is so low as to be virtually imperceptible. If we’re creating music fully in the digital realm, we therefore shouldn’t run into problems. Remember though – if you are recording any analogue instrumentation at all (guitars, vocals etc.) then there will be a noise floor there for you to consider.
Signal-to-Noise Ratio
Signal-to-noise ratio is a comparison of a desired signal with background noise that is used in many scientific disciplines. In music production it describes the ratio between the instrument we are recording (desired signal) and the noise floor (background noise). We aim for a good signal-to-noise ratio in order that the noise floor doesn’t become too audible in our mix.
Peak/RMS
In music production, Peak and RMS metering are two different methods of monitoring the level of a piece of audio. Peak level monitoring is used to understand the absolute maximum level of a piece of audio. Meter values will change rapidly as peak level monitoring works by instantaneously measuring the audio level in real-time. This kind of monitoring is useful for finding out how loud the loudest parts of your track are so that decisions can be made about whether to tame these peaks with limiting or compression.
RMS (Root Mean Square) monitoring is an average voltage level measurement for an electrical signal. This is a useful way of working out the average loudness of a track. It can be useful to consider both the Peak and RMS values of a track in order to understand its dynamic qualities better. If you find that there are large differences between the Peak and RMS values then it’s safe to assume that you are listening to a piece of audio with a large dynamic range. If the values are close together then the dynamic range is small.
How to Gain Stage Properly for a Better Mix
To begin with, consider all the places in your session where gain staging can come into play. Carefully contemplate the gain at every point in the signal path. Make sure you record at a healthy level but retain head room. Check the signal level on the inputs and outputs of every plugin you insert into the chain. If you have multiple plugins on one channel, it’s possible that there is clipping going on in between your plugins; one plugin may boost the signal too much, while the next plugin reduces it again, meaning that the clipping doesn’t register on your track fader. Also think about your fader levels, your send levels and so on. Beyond this there are a number of extra factors that you should consider.
Analogue Modelling Plugins
We’ve just mentioned that you should check the levels of plugin inputs and outputs to ensure there is no clipping. In the digital domain this is especially important for analogue modelling plugins. These plugins mimic the circuitry of hardware, and that includes the capacity to distort as the signal increases. This distortion can sound pleasing, but if you are not careful with your gain staging, you may be adding it without realising. If the signal is too hot going into these plugins right across your mix, then this low level distortion can add up, leading to a lack of clarity.
Where to Adjust Gain
If we discover our gain is too high or too low, there are often different places in a DAW where we can adjust it. Sometimes these adjustments will affect the quality of our audio.
If the overall level of your mix is too loud you can just turn down the master bus. However, it’s worth considering that in some DAWs, the plugins on the master bus are post-fader in the signal path. That means that compression and limiting on your master bus will sound different if you adjust the fader level, as the signal won’t be as hot when it hits them. Check your own DAW to find out whether the effects inserts are pre-or post-fader.
If you need to adjust the gain of an individual channel, you may just be able to move its volume fader. However, if you’ve already written volume automation, this may be a little awkward. A nice workaround is to open a new plugin at the end of the chain and use that to boost the gain. That way you’ll retain the changes in level that you’ve automated while bringing the entire signal level up or down. You can also adjust the gain on a pre-existing plugin on the channel – but remember that if you adjust the gain in the middle of the chain then subsequent plugins will receive the audio signal at a different level and this could alter the quality of the audio.
Make Sure the Master Bus Never Hits 0 dBFS
We’ve mentioned this already, but we’ll include it again as it’s so important. Even if you’re working in a floating point DAW, your audio can still distort at your output. If you bounce down a mix that is clipping, that digital distortion will be burned into your file forever. It, therefore, pays to keep a close eye on your master meter.
Hopefully, by now you’ve started to grasp the key concepts around the subject of gain staging. Some of this is a little complex, but it’s worth taking the time to understand. By controlling your gain levels at every point, you can be sure that you will start producing more professional-sounding mixes.
Comments:
May 20, 2022
Login to comment on this post